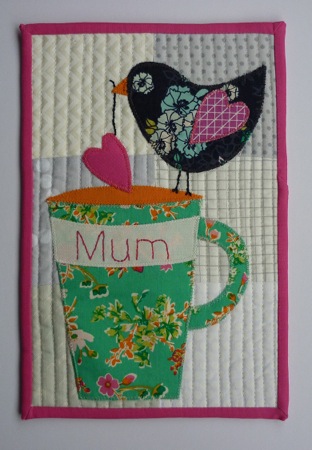
With Mother’s day just around the corner we though we’d share with you a super cute mug rug that Julie has made for us!
Hi! I’m Julie, and I blog over at www.mackandmabel.blogspot.co.uk
Today I’m sharing a tutorial for a Mug Rug that would make a great Mother’s Day gift.
The Rug measures 6”x9” (15.5x23cm) - the perfect size for holding a mug of coffee and that all important slice of cake or cookie!
It can be made mainly from scraps, but the fabrics Justine sent me are so lovely I’m pretty sure you’ll want to use them. The mug and the bird are from the Priory Square collection for Art Gallery Fabrics designed by Katy Jones.
You could, of course, substitute any name or just embroider a few flowers along the border, if you didn’t want to use it as a Mother’s Day gift.
You Will Need:
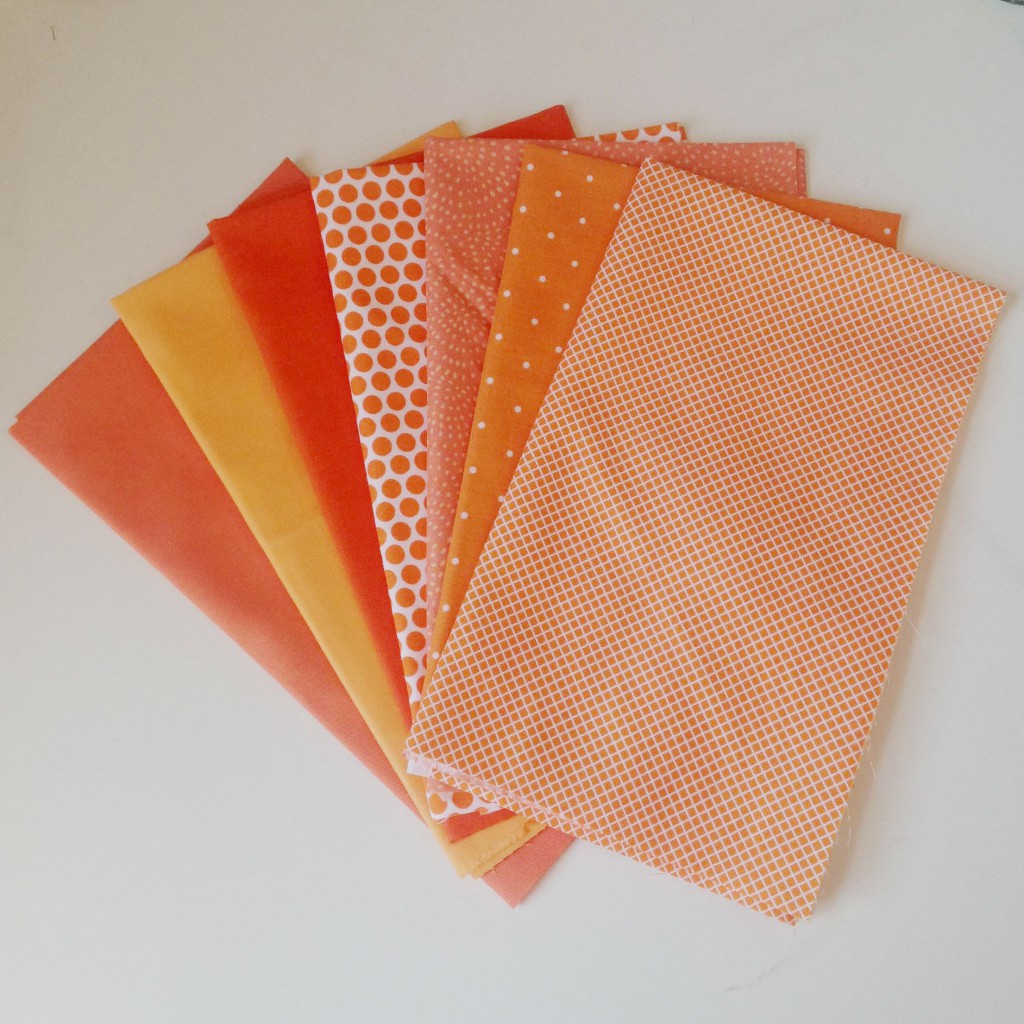
6 different 3½” square pieces of low volume prints for the background
7″x10″ piece of backing fabric
7″x10″ piece of wadding
1 1/4″ x 40″ length of fabric for the binding
6″ square of fabric for the mug
4″ x 2″ piece of solid white fabric for the name border on the mug
5″ x 1″ piece of solid fabric for the open top of the mug
4″ square of fabric for the bird
2″ square of contrasting fabric for the bird’s wing
2″ square of fabric for the heart shaped teabag that the bird is holding
A4 size or similar size sheet of Bondaweb or other fusible webbing
Sewing machine threads to match the applique
Pencil
Scissors
Sewing machine
Erasable marker pen
Embroidery thread
Embroidery needle
Construction
Start by joining the six 3½” background squares in a 3 x 2 arrangement.
Download the full instructions and full scale templates for the pieces from here: https://dl.dropboxusercontent.com/u/94402060/Free%20Blog%20Patterns/Mothers%20Day%20Mug%20Rug%20Tutorial%20with%20Template.pdf
Print off the templates and trace them onto Bondaweb. Iron them onto the back of your chosen fabrics and cut out
Trace the word “Mum onto the white border using an erasable fabric marker. Using a dry iron secure all the pieces to the background following the photo as a guide. Note: If the pen you used is heat sensitive, just iron around the edge of the mug border piece – enough to hold it in place, but without touching the wording.
Machine stitch each piece in place using a zig zag stitch (make sure you change the foot on your machine to one that will accommodate the zig zag stitch first – you will break your needle otherwise!)
Embroider over the word “Mum” using a simple backstitch.
Embroider two legs on the bird so that he is perched on the rim of the mug and embroider a string from the heart teabag to the bird’s mouth.
I was able to fussy cut the bird so that one of the flowers looked like his eye. If you are using different fabric you might like to embroider on an eye, too!
Prepare a quilt sandwich in the usual way. Baste and quilt. I did straight line quilting with my walking foot. The lines were just over ¼” apart. I chose not to quilt over the applique, which meant I had a lot of ends to sew in. If you use a Clover Self Threading needle, it makes this job a lot quicker.
I finished off the mug rug with a single layer continuous binding. There are detailed instructions on how to do this on the downloadable PDF.
Well done! You’re finished. Maybe you now need to make another one for yourself…. After all, you’ve deserved that cake and coffee!!
How lovely is that? Such a cute make for all the mums out there, wonder who will make mine?!
As ever if you do make any of the projects featured on our blog please tag us in your makes on Instagram and Facebook #simplysolidsmake